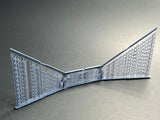
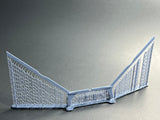
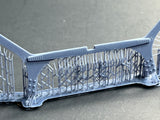
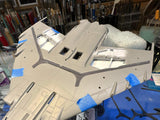
This strap was left off of the Meng kits as well as the Hasegawa kits and is a very prominent feature on all late F-4Es, Gs, Fs as well as FGR.2s and F-4Ss and others. It is an easy to install and will make a very accurate representation on your model. The set is 3D designed and printed in 8K format.
Always make sure to check your references for your particular model and time period as these were added over time, usually when the jet went to depot maintenance. They are simply a life extending airframe reinforcement plate.
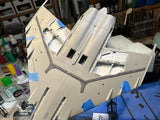
Instructions for removal , preparation and installation of Reinforcement Belly strap (PHR 48171) on the F-4E, G and S, F-4J (UK) and FRG.2. These directions are applicable to the F-4E (Late), F-4G from Meng and Hasegawa, and the F-4S and FRG British Phantom from Hasegawa / Revell in 1/48 scale. Some E models had it installed to deal with cracking that was occurring in the forward wing spar. This strap was installed on USAF F-4E Phantoms during leading edge slat retrofit. It is present on F-4E up to and including 71-0236. Beginning with F-4E 71-0237 and beyond the reinforcement was internal. All F-4Es converted to F-4G had this strap. F-4Js being converted to F-4S may have been treated similarly. UK FRG.2 and F-4J(UK) phantoms received this strap during the conversion process Check your references for the aircraft you wish to build to see if it was installed during the time period you are building. Hard wing, non slatted AF F-4s will not have it nor would any F-4C/D models. The part is printed as a single piece resin part. To remove from support structure use a sharp Hobby knife and slice through the thin supports , being careful not to break the part, supporting it on a flat surface is recommended. Use a hard backed medium to fine sanding stick and some water to sand the back of the strap flat. You may want to lightly wet sand the top side of the long thin arms to remove any print lines that are visible.wash and allow to dry. You can prime the upper surface with a filling primer , but do not paint underside. The hasegawa wing will require an additional preparation step. Hasegawa has molded the pylon sway braces into the wing surface. To prepare the underside surface of The wing These will need to be removed by sanding them flush with the wing lower surface. You will need to source a new set of pylons for your specific build (( PHR) makes a set if upgraded AF pylons ( 48-127, 48-128.) Align the center notch of the strap with the centerline panel, make sure doubler plate is aligned parallel with panel lines. The long wing plates should run parallel to wing spar just in front of gear wells. Once it is properly placed tack glue with superglue allowing it to flow under strap. Now glue the rest of the strap to the wing surface in the same fashion. You may lightly sand strap and prime prior to finish painting


